Diving deeper into Luna’s wardrobe of requirement
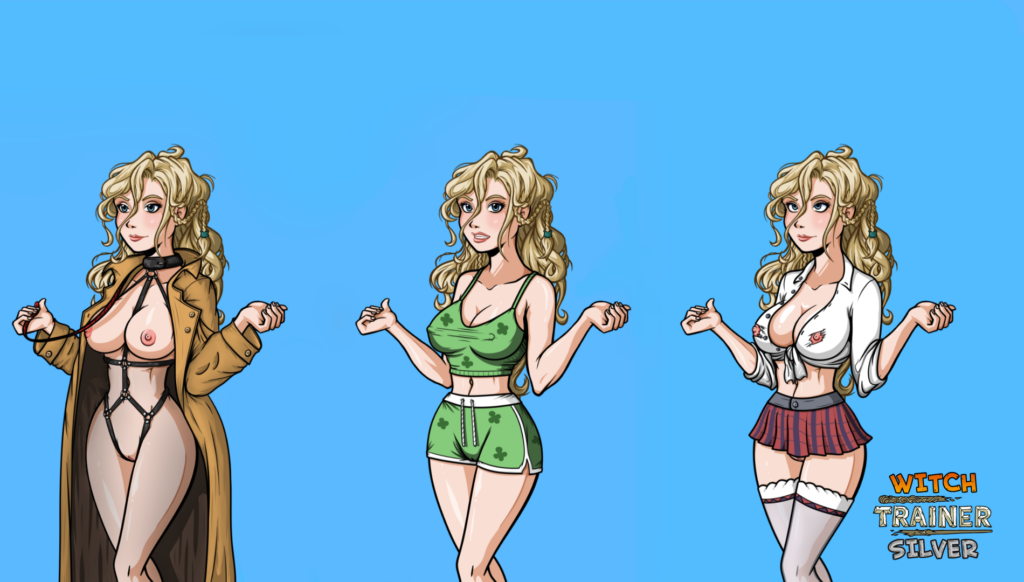
Hello everyone, and happy Friday! In today’s teaser, we’re showing off some new outfits from the upcoming Luna update.
Some would call them slutty, but we prefer to call them quirky… At least when Luna asks for our opinion. Wish you all a good weekend.
Devblog #10 – Double digits!
Hello world, Johnny here with another devblog.
As per my last devblog, I’m currently in the midst of writing spoiler heavy content, so I’ll only lightly touch on the work.
I’ve completed the writing required for the upcoming Box-o-Fun event for Luna, and I’m currently incorporating some event checks to add some variety. For example, if the player has completed Hermione’s Box-o-Fun event. After this, I’ll proceed with the proofreading phase.
I’ve also started adding some of the non-event specific writing into the game, such as gift chats and additional chit-chats for Luna.
Between writing and implementing, I’ve also been planning out some content for future updates, along with summarizing the late-stage Luna events.
As shown in the latest teaser, we’ve added piercings for Luna’s wardrobe. I’m keen to hear your thoughts on items linked to expressions, as they require additional effort to incorporate into the game. We’ve also been discussing some other things internally, such as how weird it is that all characters have shaved pubes by default. We’re also looking to add a base outfit Schedule for Luna eventually, so if you’ve got any suggestions for clothing that fits her personality or have an opinion about pubic hair, then feel free to let us know.
Aside from the work, I’ve been fuelling my creative side by rewatching the earlier Futurama seasons. I’ve been thoroughly enjoying it because I’m a huge fan of humour that pokes fun at current events and parodies real life. However, when it comes to the game, I’ve made a deliberate choice to reference things that have stood the test of time. As we all know, meme culture evolves rapidly. For instance, I opted to abandon the idea of a public event for Cho where the twins had turned someone into a pickle.
Getting into game development has been a very rewarding and fulfilling experience for us, so if we can encourage others to express themselves creatively, then that’s a win in my book. Therefore, I’d like to end this post with a segment from our artist Boppin who has put together some tips for beginners who are looking to get into art.
Heya! It’s me, Boppin! If you’re a beginner who wants to learn digital art, here are some of the things I wished I knew before starting this art journey of mine.
Beginners often make the mistake of diving head first into digital art, ending up with buying fancy pen tablets, only to lose their passion within a week and with a huge hole in their wallets. It’s crucial to start this journey with small, deliberate steps and avoid rushing in. When I started on the project, I was using a 5-year-old laptop and a Huion Inspiroy h430p tablet, which was smaller than my hand but got the job done. Since I’m now working on art in a more professional manner, I’ve since then, thanks to Loafy, acquired what is most suitable and affordable. In other words, I opted against purchasing a tablet with a screen, as they’re currently highly overpriced and not essential for my needs.
The saying “It is essential to have good tools, but it is also essential that the tools should be used in the right way.” by Wallace D. Wattles is something that every beginner in digital art should keep in mind. Many frustrations can be avoided by learning the basics of the program that you’re using.
Once you get started, I would suggest not to pour too much time into one single piece. Novice artists often begin a drawing with good intentions but find themselves constantly trying to make adjustments, adding excessive details, and ultimately straying far from their initial sketch. Spending excessive time on a single piece can sometimes lead to growing dissatisfaction, causing you to tuck it away in the depths of your hard drive. My advice: Keep your goals simple, complete your work, and then move on to the next. Keep that creative momentum flowing!
Lastly, always finish what you start. It’s important to see a piece through to completion, even if it’s not perfect. It adds to your portfolio, reveals areas for improvement, and showcases your progress. Remember, you’re not infallible, and learning from mistakes is part of the journey. Don’t be afraid to share your work with the world.
That’s a wrap for this devblog. See you in the next one!
Diving into Luna’s wardrobe of requirement
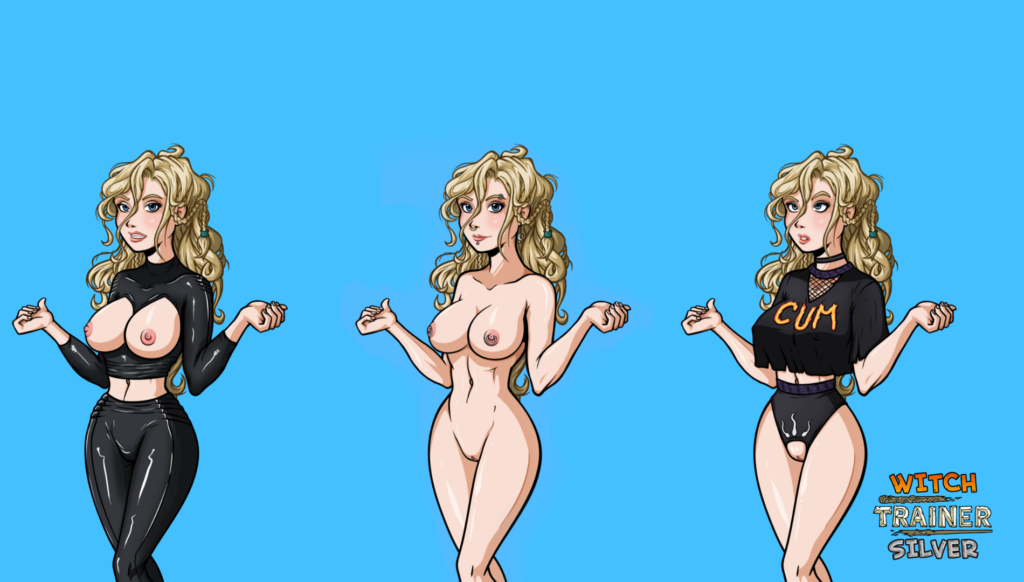
Greetings! I just took a deep dive into Luna’s wardrobe of requirement, and you guys won’t believe what I found.
Three new sets of clothing for Luna!
But that’s not all. We’re also adding a new feature, and we’re introducing it today in the form of facial piercings. In the past, we couldn’t tie items with facial expressions, but now we can.
As a result, we’ve added an elegant eyebrow piercing and a studded mouth piercing for Luna.
Witch Trainer Silver – Asset Pack #5
Hi there! We’ve got a fresh high-resolution art asset pack ready for our Silver League Trainers supporters on Patreon. This pack contains all the new clothing items from the past year, as well as some sets from the upcoming update. Enjoy!
Project Update: Temporary Changes Ahead
Hello everyone, Johnny here with an important update.
For those of you who may not be frequent Discord users, I want to inform you that our update posts and teasers will be temporarily relocated to Discord. This change is happening as Loafy, who manages our Patreon account, takes a break. While I won’t go into the details here, I encourage you to refer to Loafy’s own message in the news channel on Discord for a full explanation.
During this period, the rest of the team will continue to work on the game. However, please bear in mind that teasers and devblogs may be a bit less regular, as they typically involve both me and Loafy.
Before we make this temporary move to Discord, we’re releasing another art pack for Silver League Trainers. This pack includes all the clothing sets from the past year, as well as some unreleased ones that haven’t been previewed yet.
As always, we truly appreciate your ongoing support for the project, and we look forward to seeing you over on Discord!
Devblog #9 – To degeneracy and beyond!
Greetings, everyone! Johnny here, with yet another devblog.
As I’m in the midst of working on Luna writing, I’d like to take a moment to share some ideas I’ve written down while going over Hermione’s content. Before I proceed, I want to provide a heads-up that this post may contain spoilers. My intention with this post is to gather valuable feedback from all of you and to create an opportunity for you to contribute your own ideas before I delve deeper into the planning and writing process. What I’ve written down so far, is in very much in its early stages and isn’t fully realised yet, so I anticipate it evolving and changing before the final product. With that clarification in place, let’s delve into the mind of a lunatic… I mean, adult visual novel writer.
I’ve been considering adding tier-up events for Hermione, similar to how we do it with Cho’s Quidditch matches, as a way to make the leap between tiers smoother. Below, you’ll find how Hermione’s attitude towards favours changes as you progress to higher tiers, along with some general ideas for the tier-up events.
Tier 4:
Hermione’s naughty side emerges quite a bit during this tier, but it takes sexual stimulation or prompts from Genie for her to display it. She’s somewhat embarrassed when putting herself on display, and she will now start touching Genie when requested (handjob), as long as she is paid well.
Potential 3-4 Tier-up events:
Hermione has given up on preventing other teachers from selling favours, realising that there’s no way to stop it. This would also explain why “flirt with teachers” is no longer an option for public requests. Some writing during tier up events would differ if the player has done public requests.
There is currently an optional ‘talk to me’ event on this tier with Tonks that mentions Hermione’s attitude changing. This event may serve better as a tier-up event, and there would instead be a more regular ‘talk to me’ event in its place.
Tier 5:
Hermione’s attitude has shifted drastically, as she agrees to perform fellatio without making a fuss. This shift in attitude is quite sudden, and her only explanation is that she’s happy to be able to help her house, and that putting a penis in her mouth is nothing as long as it helps her cause.
She has a greater appreciation towards everything sexual, and she sometimes forgets about points. With her attention on schoolwork tapering off a bit, Hermione’s drive to excel is instead shifting towards the sexual favours. For example, she will blame herself when she doesn’t manage to swallow all of Genie’s cum.
Additionally, she now allows you to use nicknames such as “whore” and “slut.” Her argument being that if it helps reach her goal during the favours, then it’s fine by her. Although she perceives it as nothing more than a sexual aid rather than how Genie actually views her.
Potential 4-5 Tier-up events:
As yet, there are no well-crafted notes, but since this tier has the biggest shift in her attitude, there needs to be a solid reason for it. Perhaps Genie and Snape would come up with a scheme that would lead Hermione to put more effort into it. Such as Hermione overhearing a conversation between them where Genie thinks about ending the trading between Hermione and him. If that’s not enough, Snape can say he’d be happy to take over the trading.
Tier 6:
She remains steadfast in her commitment to help Gryffindor win the cup, but her inner desires occasionally get the best of her, revealing her enjoyment. You’ll find it much easier to persuade her to engage in explicit conversations or to dress provocatively, and she might even do so without any prompting.
Potential 5-6 Tier-up events:
This tier shows a smaller change in attitude than the one before, as she will immediately agree to have sex. My first thought for the tier up events was to include something where Hermione gets pushed to her limit, with the goal of sex not feeling like such a daunting task. A deep-throat event would be fitting, especially since the one during the ball ending is both unprompted and sudden.
Other notes:
There are a few additional events that I haven’t had a chance to go over yet, and I thought I’d mention them briefly. The ball, for instance; features a sex scene, which can be reached before the sex favours. The writing for tutoring is quite different and doesn’t align with the rest of the game, especially the later events. I’ve left those events alone for a while now, as I’m unsure how players feel about them, so I would appreciate your feedback.
That concludes what I’ve written down about her progression so far. Please let me know what you think, and if you’ve got any ideas of your own, don’t be afraid to share them in the discussion channel on Discord.
